Making API calls using OpenRefine
About this guide
This is part two of a step-by-step account of how to use DigitalNZ's API to access and work with metadata from Alexander Turnbull Library collection records.
Carrying on from part one, our research question seeks cartoons on rugby from 2011.
This guide teaches you how to export your data into OpenRefine 2.6, an open-source, cross-platform program that is good at dealing with messy data.
Please note that the Alexander Turnbull Library is not associated with OpenRefine and researchers download it at their own risk.
Once you have completed this guide using the examples, you will know how to create a table that has your collection metadata in a tidy format.
Prelimary step
You will need to install OpenRefine on your computer if you don’t already have it. Download OpenRefine from their website.
Once you've installed OpenRefine, open your web-browser and go to http://127.0.0.1:3333/. This takes you to the application on your computer.
Step 1: Create your project
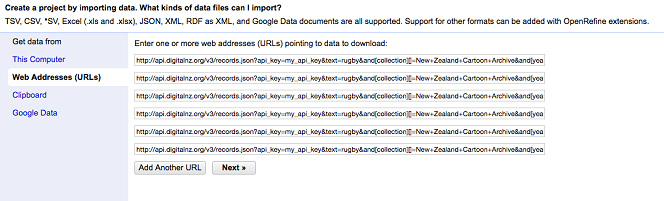
Click on Create Project on the left. Under the heading Get data from, click on Web Addresses (URLs).

You need to change one thing in the API string you generated using the first guide. Because OpenRefine works better with json data than with xml, we are going to change the requested format.
Near the beginning of your API string, change xml to json. You can see this in bold below:
http://api.digitalnz.org/v3/records.**json**?api_key=my_api_key...
Enter this new API string in OpenRefine. Remember to include your unique API key, and if you copy and paste, watch out for the link breaking into into multiple lines. Now click Add Another URL.
You now need to paste the four remaining URL strings you created. They ended &page=2, &page=3 and so on up to five. Your screen should then look like this:
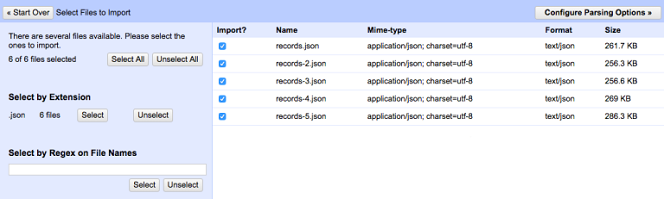
Click Next and OpenRefine will import the data – this may take a little while. Check that all five records are ticked for import:
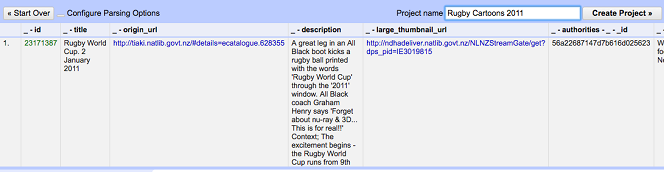
Now tell OpenRefine which data to import by clicking on Configure Parsing Options at the top right. Hover over the data and using the yellow area to narrow it down to between results and id. It should look like this:
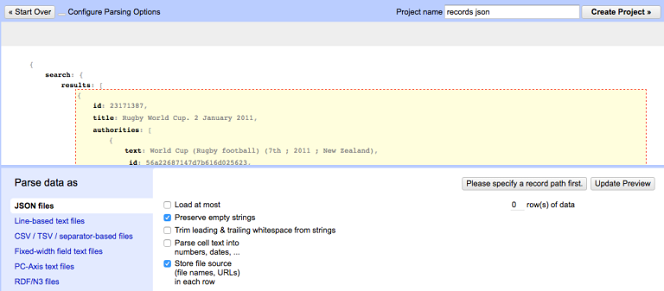
Click the yellow area and you'll see a preview that looks like this:
In the box Project name, enter your chosen name. We called ours Rugby Cartoons 2011
OpenRefine guide 6
Click Create Project in the top right. You now have your data ready to clean or reformat.
You can export your data at this point using the Export button at the top right. You can then, for instance, export it directly into Excel if you prefer that programme.
Step 2: Becoming familiar with OpenRefine
Because new items are always being added to the collections, the number of records and rows you see will be different to what's shown in this guide. It doesn't mean anything's gone wrong!
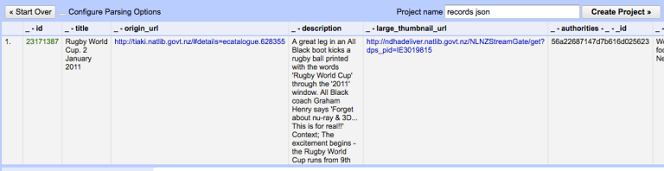
Take a moment to look at your new spreadsheet. It should look like this:
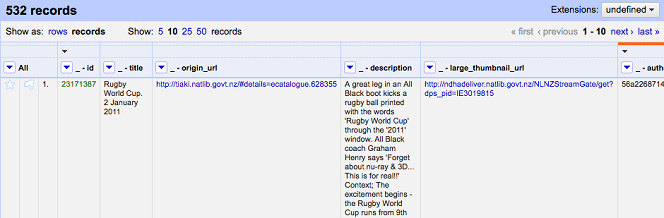
Currently you are looking at the records view.
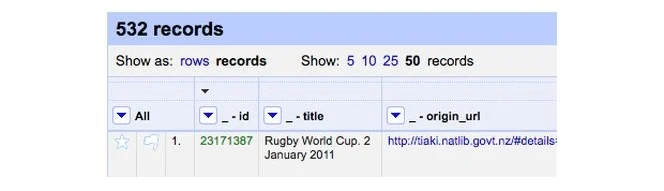
Click on rows. This means you see many more rows, like this:

Unlike programmes like Excel, OpenRefine allows you to work in records and rows. You can switch back and forward between these two modes depending on what you want to do.
When you are using the records mode, OpenRefine uses the first column on the left (in this example, the id file) in order to sort your data into records.
You might like to think of OpenRefine as a box, with many folders for each record, with each folder containing lots of bits of paper with information on them. With the rows view, you just see the paper, not the folders.
You can also change how much you see on each page. You can choose between 5, 10, 25 or 50.
Change your setting to show 50 records:
You can look at any page using the next and last options at the upper right.
At the top left is the undo/redo option. If you make a mistake, you can always revert to the previous version – even if you’re a beginner you can’t go wrong!
Step 3: Renaming your columns
First you should rename the columns with tidy descriptions. There is no computational need to do this, but it will help you follow along, clearly knowing which column is meant in the instructions.
Each column heading has a down arrow. Click this to open up different options. When this guide tells you to ‘click’ the title column, you should click the down arrow.
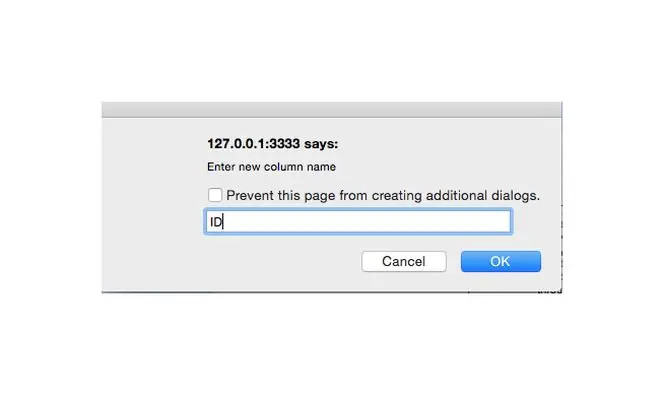
Click _-id, then Edit column, then Rename this column.
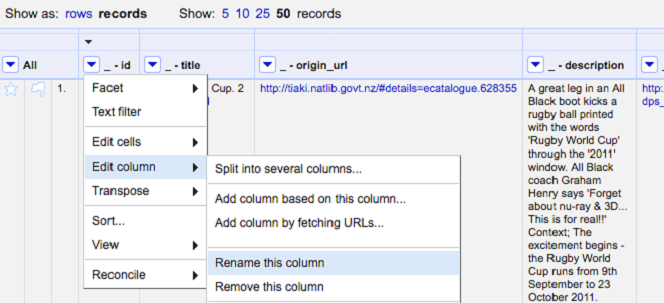
A new window will appear: rename this column ID
Now rename the other columns, using this same process. Change them as follows:
Old name | New name |
|---|---|
|
|
|
|
|
|
l |
|
|
|
|
|
|
|
|
|
|
|
You can leave these two columns as they are:
_ - authorities - _ - _id
_ - authorities - _ - authority_i
Step 4: Removing unwanted columns
In our example we have 11 columns. But we don’t need all of them.
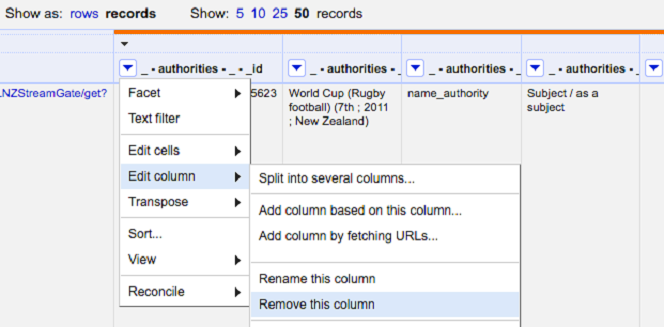
Delete the column labelled _ - authorities - _ - _id. You do this by clicking on the arrow, choosing Edit column and then Remove this column:
Delete the column labelled _ - authorities - _ - authority_id in the same way.
You now have a basic spreadsheet. It's up to you to clean this data as much or as little as you need for your research purposes.
In the next guide, we show you some of the steps that we used to get the data into a format that suited us. You may not want to use all of these steps, or you may need to modify them to fit your own research needs.